Use module with an Automation Account
By using our dynamic group module with an Azure Automation Account, you can easily automate and schedule advanced group memberships in a manner that is currently unsupported by the built in dynamic/criteria based groups.
Prerequisites:
- A working Azure Subscription
- Account with Global Administrator permissions
- Group(s) that you want the module to administer
- (Optional) API endpoints for actions to be taken when adding/removing users from groups
Configuration
1.1 Create Automation Account and import module
- Create an Automation Account from the Azure Marketplace and deploy it to your designated subscription/resource group.
- Go to Shared Resources -> Modules -> Add module
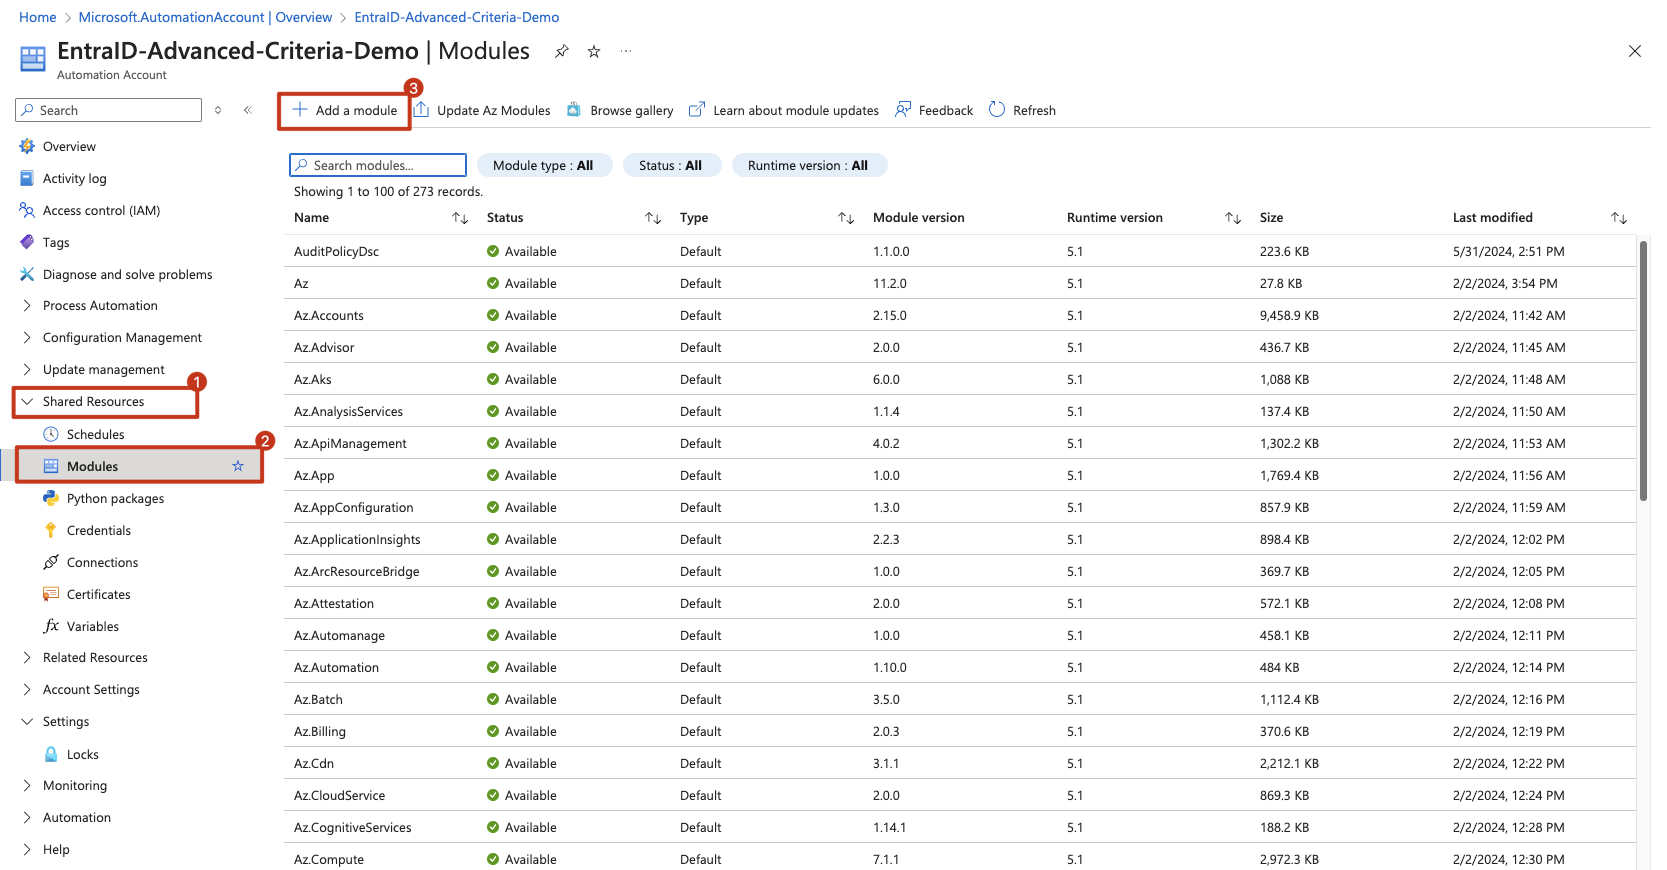
- Do the following:
Select "Browse from gallery"
Click the link named "Click here to browse from gallery", search for "AdvancedCriteriaBasedGroups", and click Select.
Use Runtime version 7.2.
Click on "Import"
The module should now be loaded in your Automation Account.
1.2 (If not using Marketplace offer?) Create a User Assigned Managed Identity
❗️ IMPORTANT: This step requires an account with Global Administrator
If you are configuring this yourself, you need to create a User Assigned Managed Identity that has the permissions required for the module to run. The permissions are the following: - Owner permissions on groups that the module will administer - User.Read.All OR User.ReadWrite.All - (Optional, depending on use) Group.ReadWrite.All
1.2.1 Create a User Assigned Managed Identity and assign it:
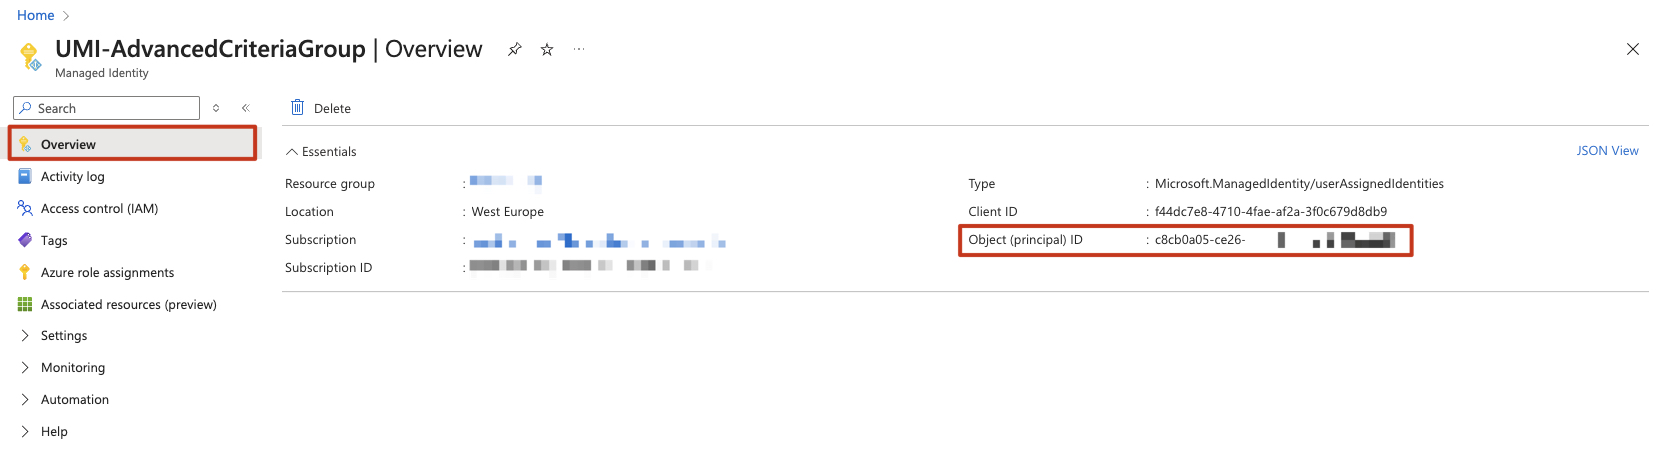
- Find User Assigned Managed Identity on the Azure Marketplace.
- Create it in the same Subscription/ResourceGroup where the Automation Account is located
📝Keep the Object ID of the Identity, you will need it when setting permissions
- Assign the Identity to the Automation Account
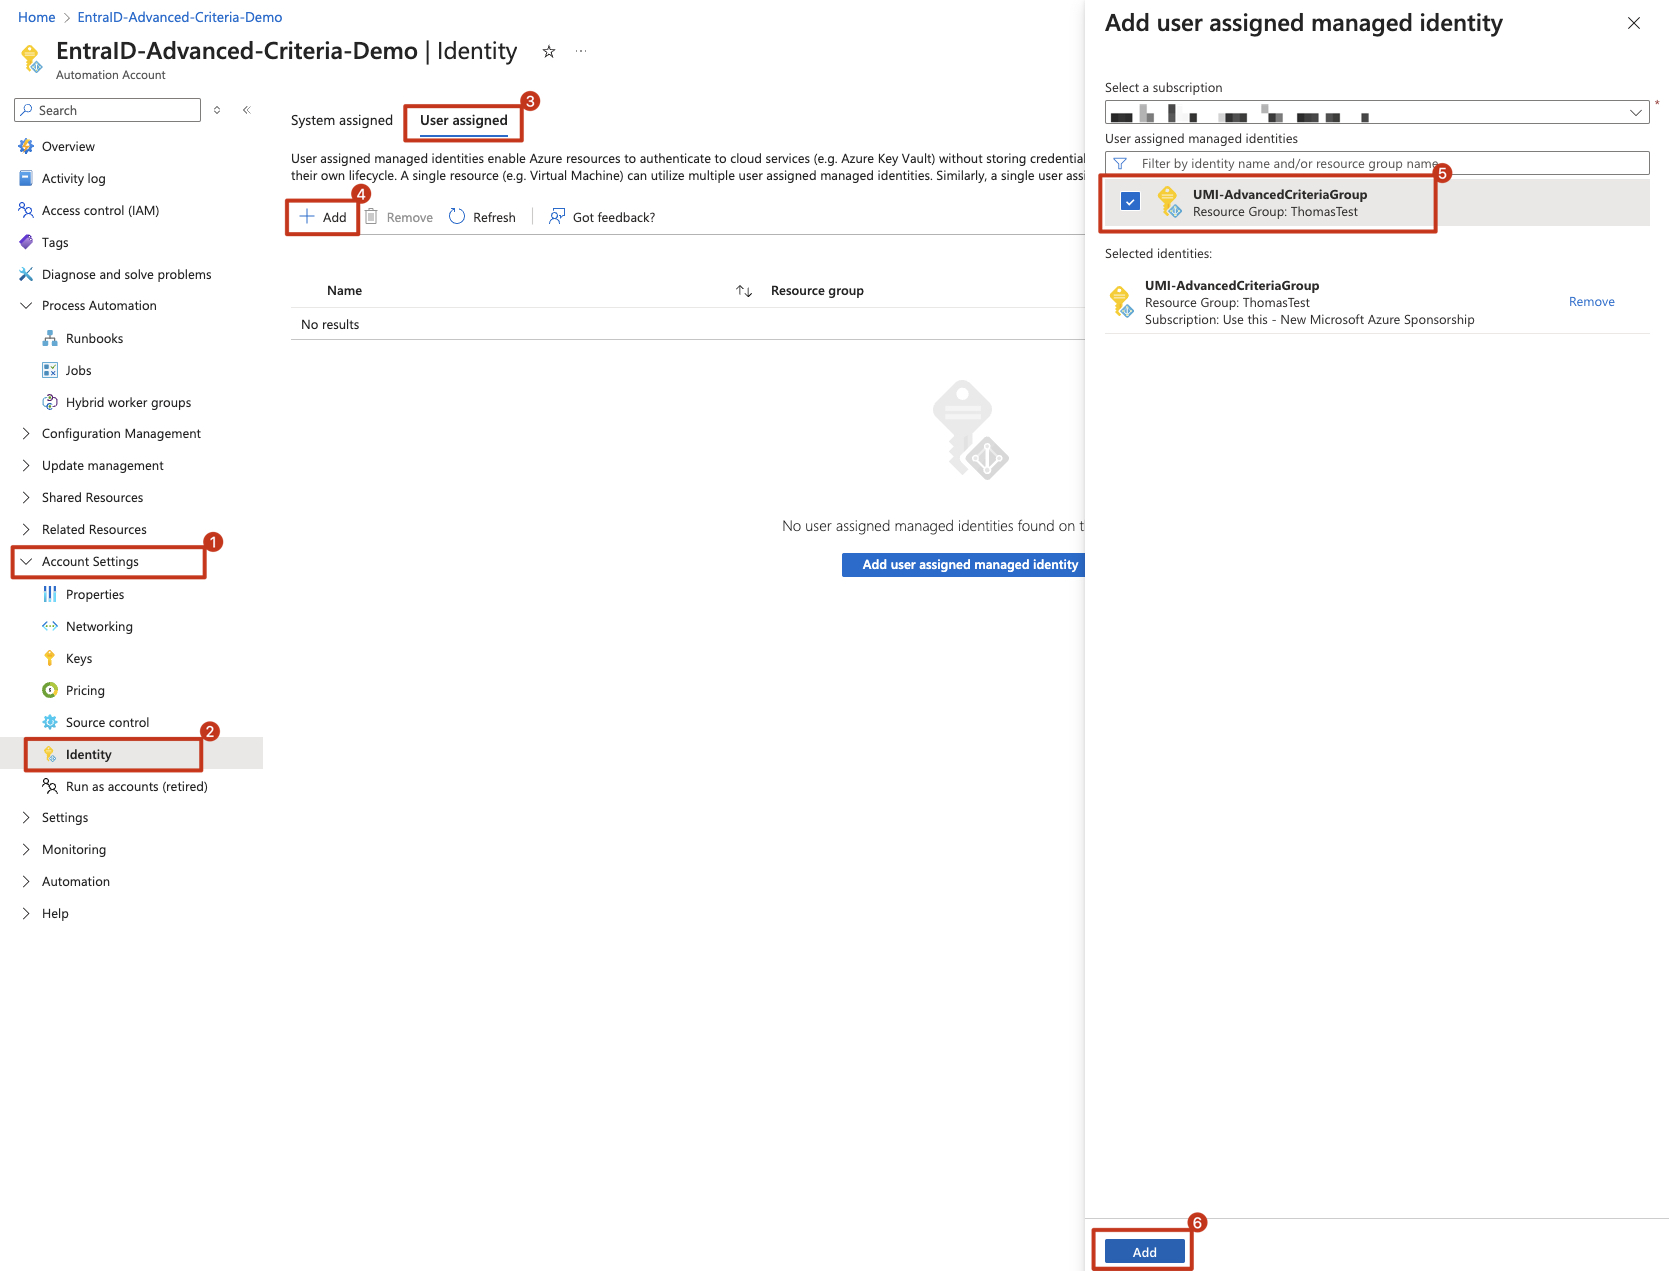
- Assign the Identity as owner on the groups that it needs access to
1.2.2 Assign Microsoft Graph permissions to User Assigned Managed Identity
❗️ IMPORTANT: This step requires an account with Global Administrator
This step also requires that you do some steps with Powershell on your machine or in the Azure CLI.
- Open Powershell as an Administrator
- Copy the following code-snippet to Visual Studio Code (recommended), notepad or your favourite word processor, and edit the code to match your environment.
# Replace the object ID below with the one you created earlier $managedIdentityObjectId = "XXXXXXXX-XXXX-XXXX-XXXX-XXXXXXXXXXXX" Install-Module -Name AdvancedCriteriaBasedGroups Import-Module AdvancedCriteriaBasedGroups -Force Connect-MgGraph -Environment Global -Scopes AppRoleAssignment.ReadWrite.All, Application.Read.All # Edit -GraphPermission to "User.ReadWrite.All" if you require the automation to have write permissions on user objects. # You can add more permissions if you wish by comma-separating the permissions. #Example: -GraphPermission "User.Read.All", "Group.Read.All New-MicrosoftGraphServicePrincipalApplicationPermission -ObjectId $managedIdentityObjectId -GraphPermission "User.Read.All" - Run the snippet from VS Code/paste the edited code into Powershell and run it.
1.3 Create a runbook
- Go to Process Automation -> Runbooks -> Create a runbook

- Set the following Basic information:
Name: Pick a suitable name for your action
Runbook type: Powershell
Runtime version: 7.2 (or whichever version is recommended)
Description: A fitting description for your run (optional, but recommended)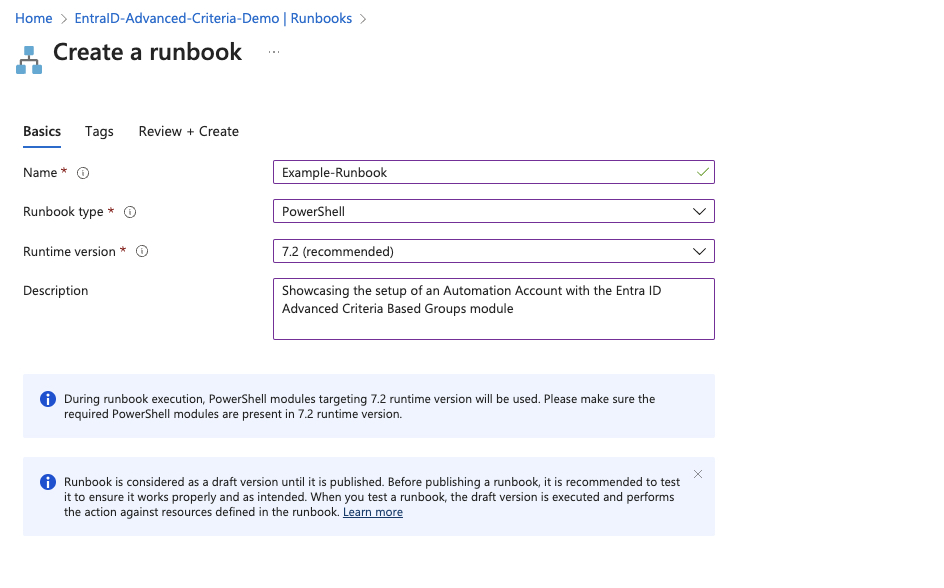
- Add tags if your environment requires it, and click Create