Authenticating PowerShell
This page describes different ways of authenticating PowerShell to the Fortytwo Universe, for different automations, such as uploading file data, talking to the connector API, etc.
All scripts use the EntraIDAccessToken PowerShell module, which means that the only thing required to connect is to complete one of the available Add-EntraID*AccessTokenProfile cmdlets. This is documented here, but below are the most common scenarios covered.
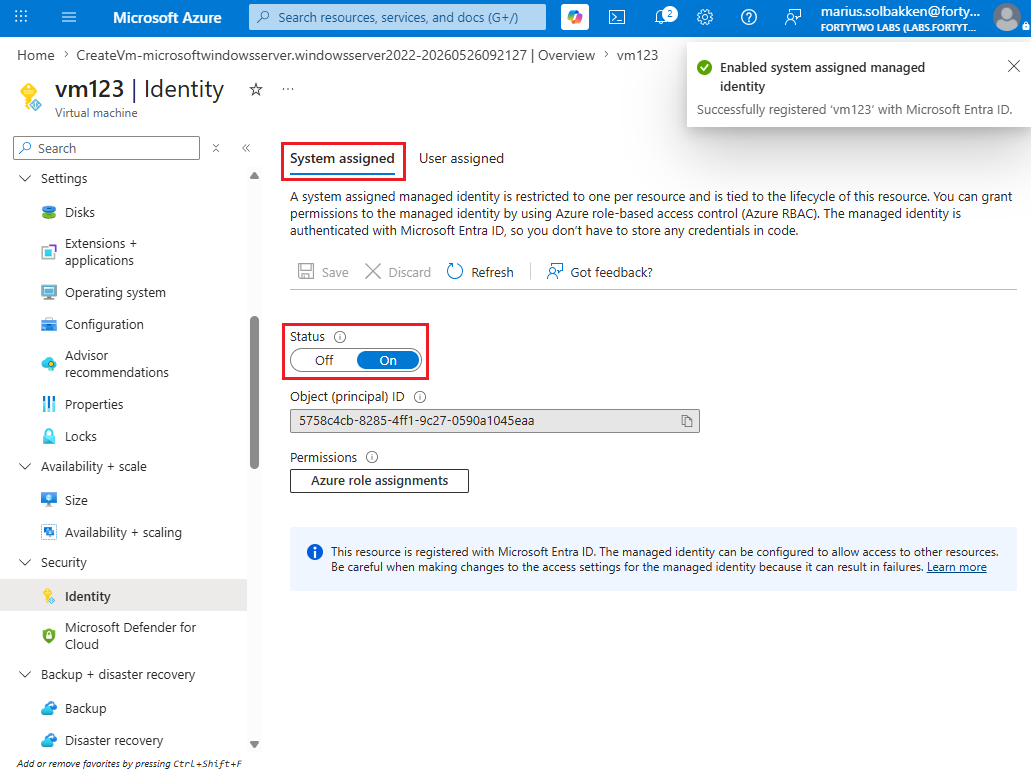
Running in an Azure VM
Server must be in a subscription in the same tenant as you want to manage Fortytwo Universe for. If you need cross tenant authentication, use the certificate based approach just like alocal server.
System assigned
User assigned
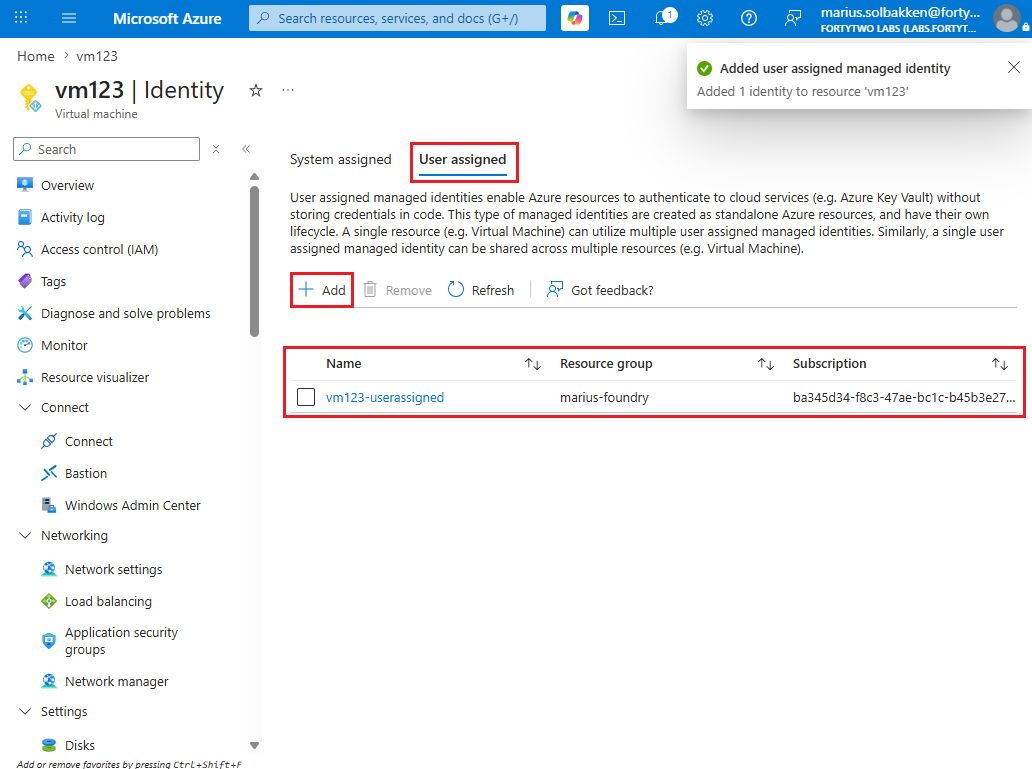
Add-EntraIDAzureVMMSIAccessTokenProfile -Scope "https://api.fortytwo.io/.scope" -Name Connector -UserAssignedIdentityClientId "00000000-0000-0000-0000-000000000000"
Running on a local server
Azure Arc
Add-EntraIDAzureArcManagedMSITokenProfile -Resource "https://api.fortytwo.io" -TenantId "00000000-0000-0000-0000-000000000000" -ClientId "00000000-0000-0000-0000-000000000000"
Certificate based authentication
In order to use certificate based authentication, the following steps must be completed:
- On the server you want to run your automation on, run PowerShell as an Administrator and create a new self signed certificate using the PowerShell cmdlet
New-SelfSignedCertificate:
$Certificate = New-SelfSignedCertificate -Subject "connector" -NotAfter (Get-Date).AddYears(100)
[System.Convert]::ToBase64String($Certificate.Export([System.Security.Cryptography.X509Certificates.X509ContentType]::Cert), "InsertLineBreaks") | Set-Content -Path "connector-$($env:COMPUTERNAME).cer"
Write-Host "" "Thumbprint:       $($Certificate.ThumbPrint)" "Certificate file: connector-$($env:COMPUTERNAME).cer" "" -Separator "`n"
- Note down the thumbprint and keep the certificate file created available for the next steps
- Go to the Entra ID portal as an Global Admin, Application admin, Cloud application admin
- Create a new App registration with a name that suits your naming convention:
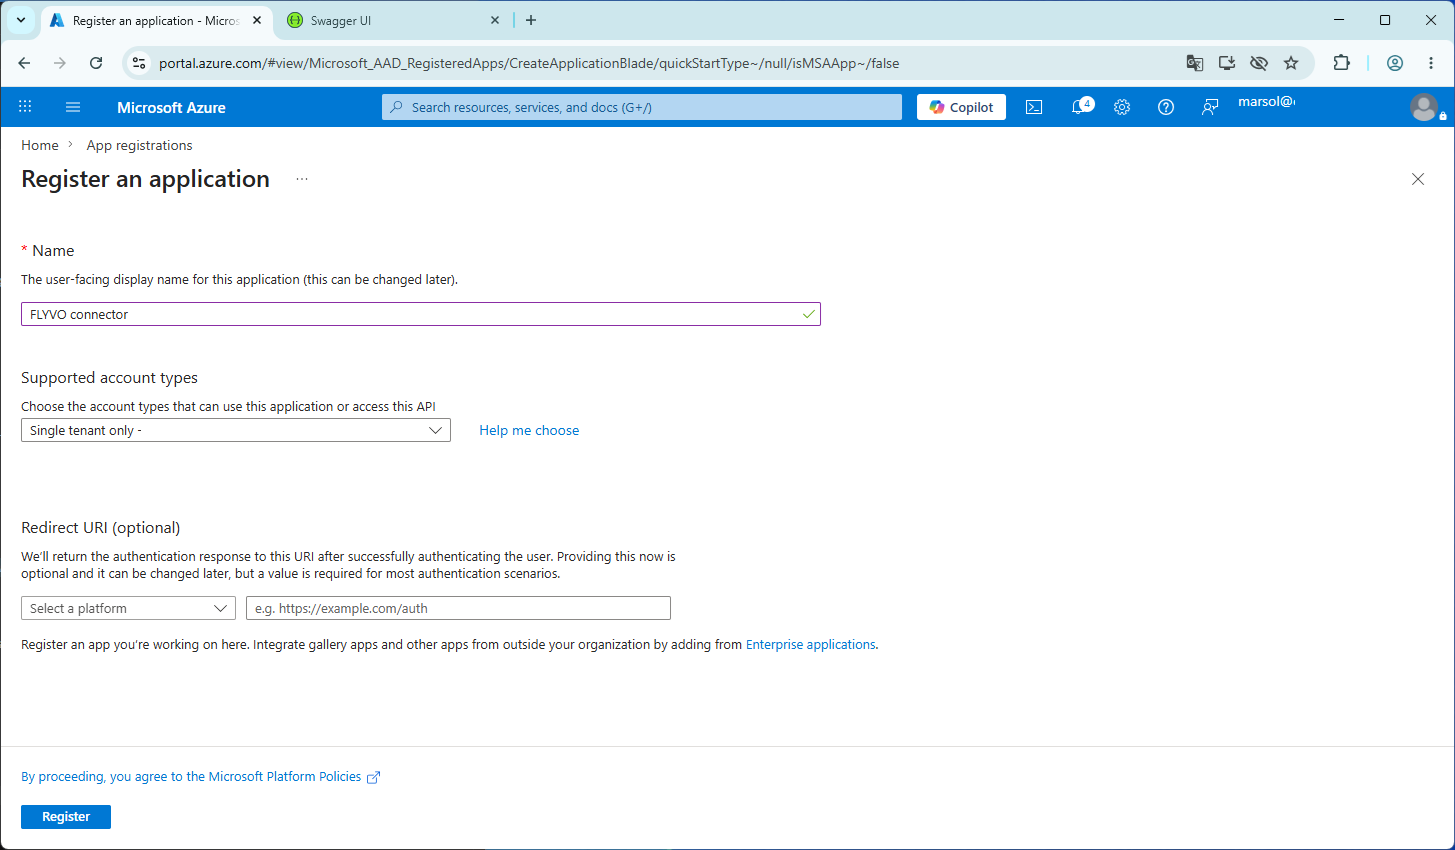
- Note down the Client ID and Tenant ID on the first page you get to after creating the app registration
- Go to Certificates & secrets, select Certificates and click Upload certificate
- Upload the exported .CER file from the PowerShell above

You have now configured authentication, and can authenticate to Fortytwo Universe as follows: